The features included in Stories make it look like a mini editing suite. While the basic nature of Stories is ephemeral since one lasts for 24 hours only, you can extend their life by adding them to Highlights. We have already covered the basics of Story Highlights. Here you will get to know them in detail. Let’s take a look at the Instagram Story Highlights tips, tricks, and hidden features.
1. Add More Highlights
Did you know that you can add more than one Highlight folder? You can create multiple Highlights, and they can have numerous Stories in them. There are three ways to populate more Highlights.
Method 1: From Stories
Step 1: Create a Story, publish it, and then tap on the Highlight icon. Step 2: You will get the Add to highlights menu. Tap on the New icon. Step 3: Give your Highlight a name and press the Add button. You will see the newly created Highlights on your profile screen.
Method 2: From Profile Screen
Step 1: Go to your Instagram profile screen and tap on the New icon just below your profile picture. Step 2: You will find yourself in the Story Archive section. Here select the Story that you want to add to this Highlight and tap on Next. Step 3: Give a name to your Highlight and hit the Done button.
Method 3: From Archives
Another way to create more Highlights is from the Story Archive tab. In the archives, tap on the story that you want to add to another Highlight. Then hit the Highlight icon at the bottom of the story. You will get the familiar Add to highlights menu. Tap on New.
2. Add Stories to Existing Highlights
You don’t need to create a new Highlight for every story that you add on Instagram. You can append stories to any existing Highlight. To do so, when you tap on the Highlight icon, tap on any existing Highlight instead of New. Your Story will appear in that Highlight.
3. Move Story from One Highlight to Another
Even though Instagram doesn’t provide a dedicated button to move stories from one Highlight to another, there is a simple workaround for that. Here’s what you need to do. Step 1: On your profile screen, tap on the Highlight from which you want to move a story. Step 2: Go to that story and tap on the three-dot icon at the bottom-right corner. From the menu, select Remove from Highlight — this will remove the story from the current Highlight. Step 3: Now go back and add this image to another Highlight as you would usually do from Story Archives.
4. Add New Title
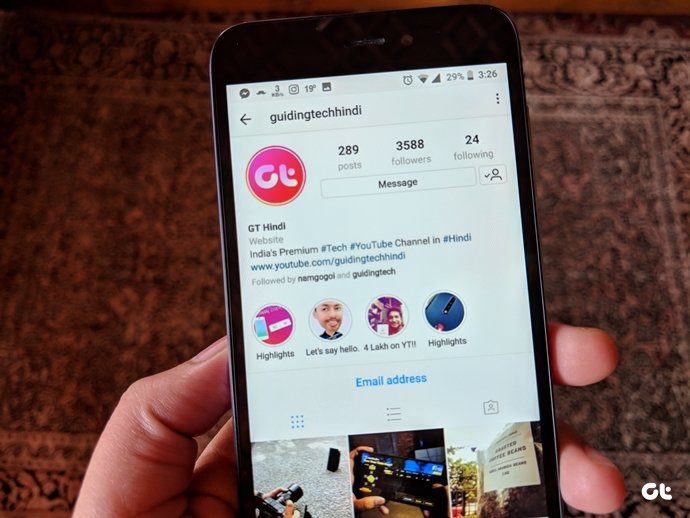
You will get the option to name your Highlight while creating it. You can always rename it later. All you need to do is hold (long press) the Highlight on your profile screen. Then from the pop-up menu select Edit Highlight. Here give a new name to the Highlight in the Title section. The titles can have up to 15 characters out of which only first 10 characters will show up in the bio. You can even add emojis.
5. Delete Highlights
You can remove individual items in a Highlight and also the full Highlight folder. In case you delete the only story in a Highlight, the entire Highlight folder will get deleted automatically. To delete a Highlight folder, long press or hold the Highlight on your profile screen and tap on Delete Highlight. To delete individual items, open the Highlight from the home screen and go to the item. Then tap on the three-dot icon at the bottom-right corner and select Remove from Highlight.
6. Share Highlights
Like someone’s Highlights? Instagram provides a native way to share them with your Instagram buddies. You can share your Highlights as well as someone else’s. Thankfully, if you want to share Highlights with non-Instagram users, you can do that as well. For this, Instagram provides you a Copy Link feature to share the Highlight link with anyone. Navigate to the profile whose Highlight you want to share. Then hold the Highlight folder on the profile screen and from the menu select Send to if you are going to share it with Instagram users. Then choose the people with whom you want to share the Highlight. If you want to share on other platforms, tap on Copy Link and paste it wherever you want to share it. If you want to share individual Highlight items, open the item from the Highlights on profile screen and tap on the three-dot icon. Then select Send to option. Similarly, if you want a link to share on other platforms, tap on Copy Link.
7. Download Instagram Highlights
At times while checking Instagram, you may stumble upon a really cool Highlight folder with interesting stories. Even though you can take screenshots and save them on your phone, it’s not a smart way to include the irrelevant elements like the buttons in the photos. To avoid it, you should follow our guide to download the Highlights using a third-party website.
8. Change Highlight Cover
You don’t have to live with same or automatically generated Highlight covers all your life. You can change it with these steps: Step 1: Hold the Highlight on your Instagram profile screen and from the menu, select Edit Highlight. Step 2: Tap on Edit cover. You will be shown all the images present in that Highlight. If you want one of them, select it. But if you’re going to use a custom image, tap on the small Gallery icon present on the left side of image icons. Step 3: Select your image and tap on Next. Step 4: Adjust the image and hit Done. Congratulations! You have a new cover for your Highlight.
9. Add Highlights Without Posting to Story
Are you wondering if that is possible? Well, kind of. Since it is mandatory that the Stories should remain live for twenty-four hours to be kept as a Highlight, you will need to hide your story from everyone. This way no one will see your Story and you will also be able to add those images to your Highlights. Follow our guide to create Highlights without adding to Story.
Take Full Advantage
Stories are more popular than normal Instagram posts now. However, normally they only last for 24 hours. Highlight is a nice way to keep your stories visible to everyone forever. So you can create different Highlights to organize your Stories. Highlights are extremely help for businesses as well. Brands can showcase their products in a much better way using Highlights. The above article may contain affiliate links which help support Guiding Tech. However, it does not affect our editorial integrity. The content remains unbiased and authentic.


