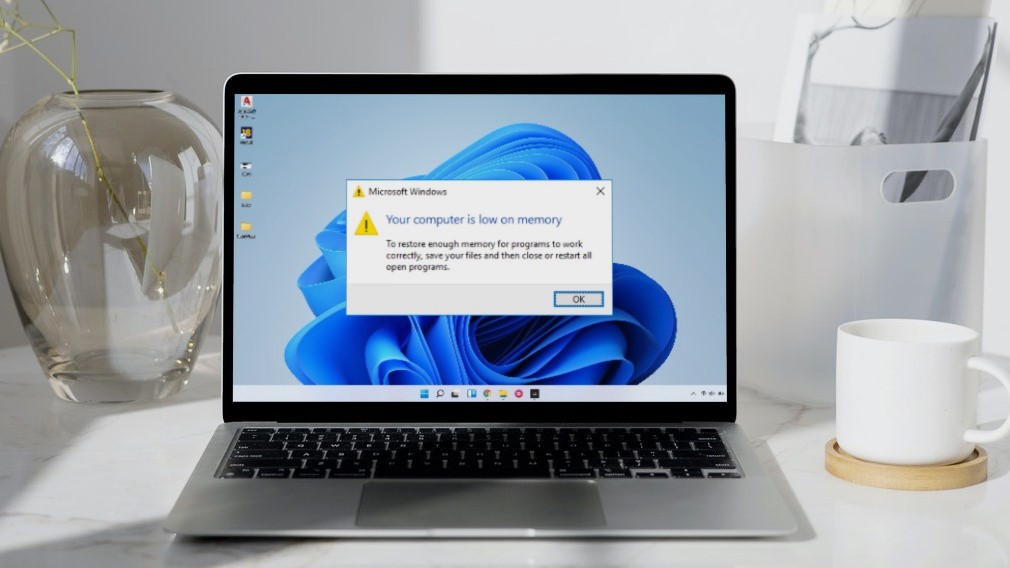
When a certain app sucks up system resources or a malware impact it, these solutions can help you fix the ‘Your computer is low on memory’ error on Windows 10 and Windows 11. So, let’s check them out.
1. Close Unwanted Apps and Programs
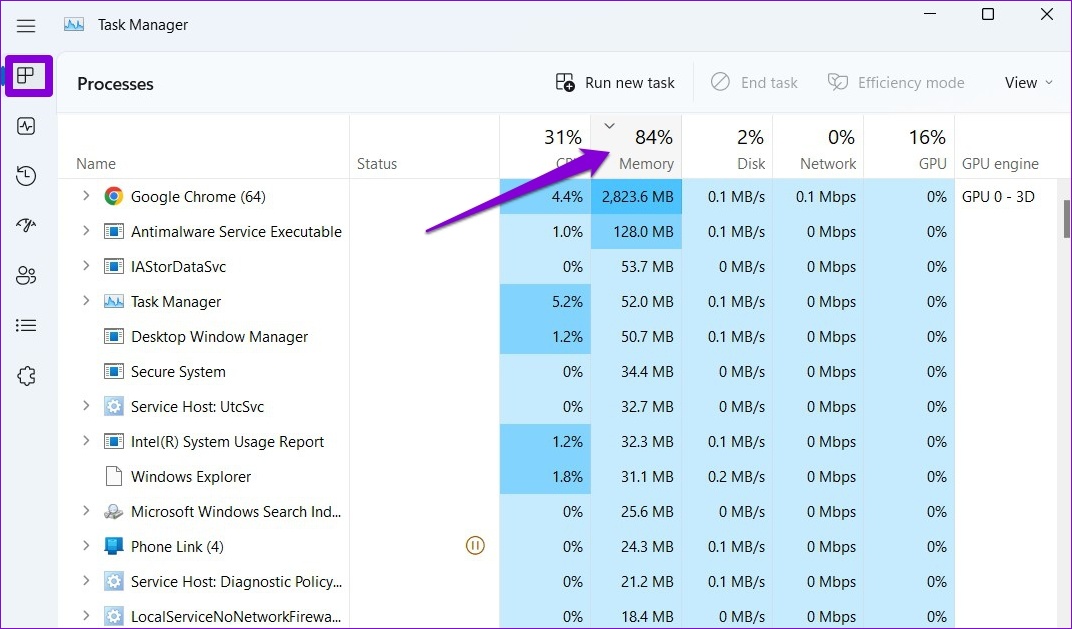
You’ll need to close any apps and programs on your computer, especially the ones consuming a major chunk of your PC’s memory. You can use the Task Manager on Windows to identify such apps and programs. Here’s how. Step 1: Press Ctrl + Shift + Esc shortcut to launch the Task Manager quickly. Step 2: On the Processes tab, click on the Memory tab to sort apps based on the RAM usage.
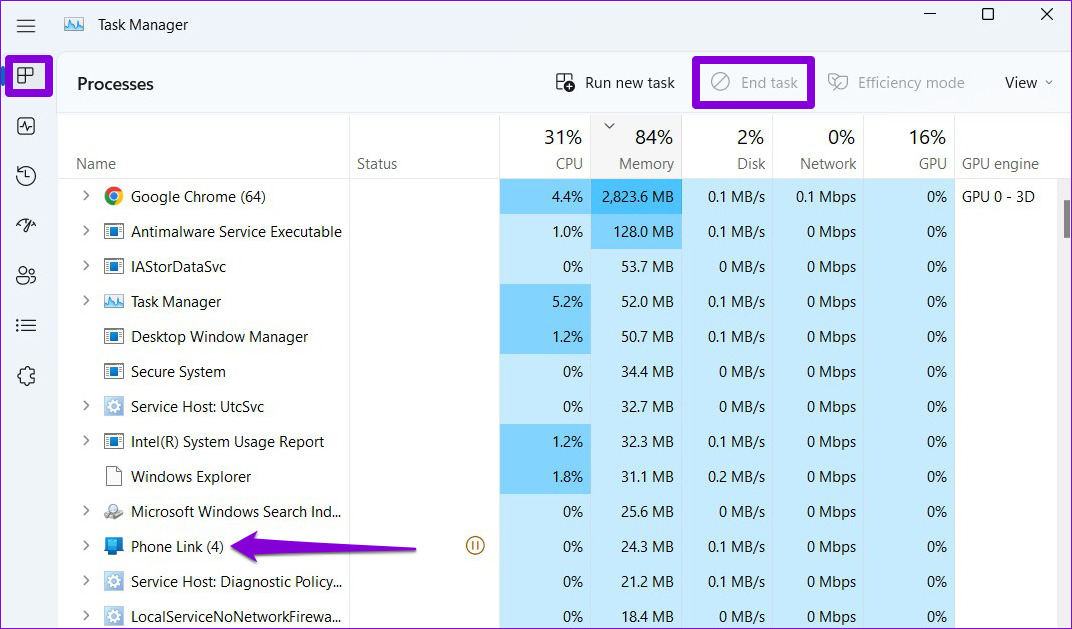
Step 3: Select the program you don’t need and click on the End task button at the top to close it. Repeat this step to close all the unwanted apps and programs.
This should help free up memory for the other tasks on your PC and fix the ‘Your computer is low on memory’ error.
2. Run System Maintenance Troubleshooter
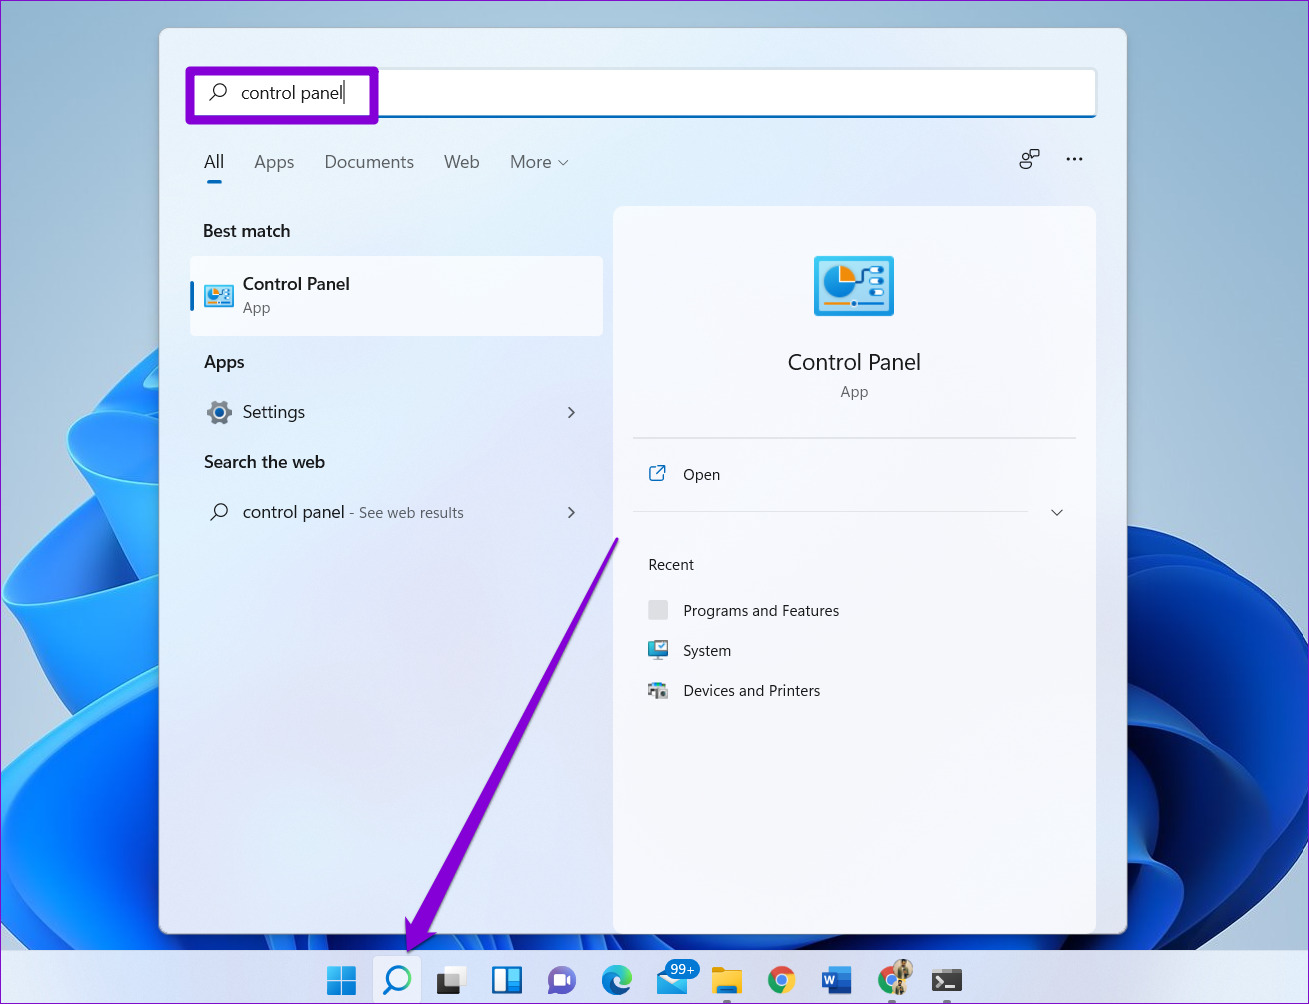
Running the System Maintenance troubleshooter allows Windows to clean up unused files, shortcuts and perform various maintenance tasks. You can also use this tool to fix abnormal memory usage on your PC. Here’s how. Step 1: Press Windows key + S to open the search menu, type control panel, and press Enter.
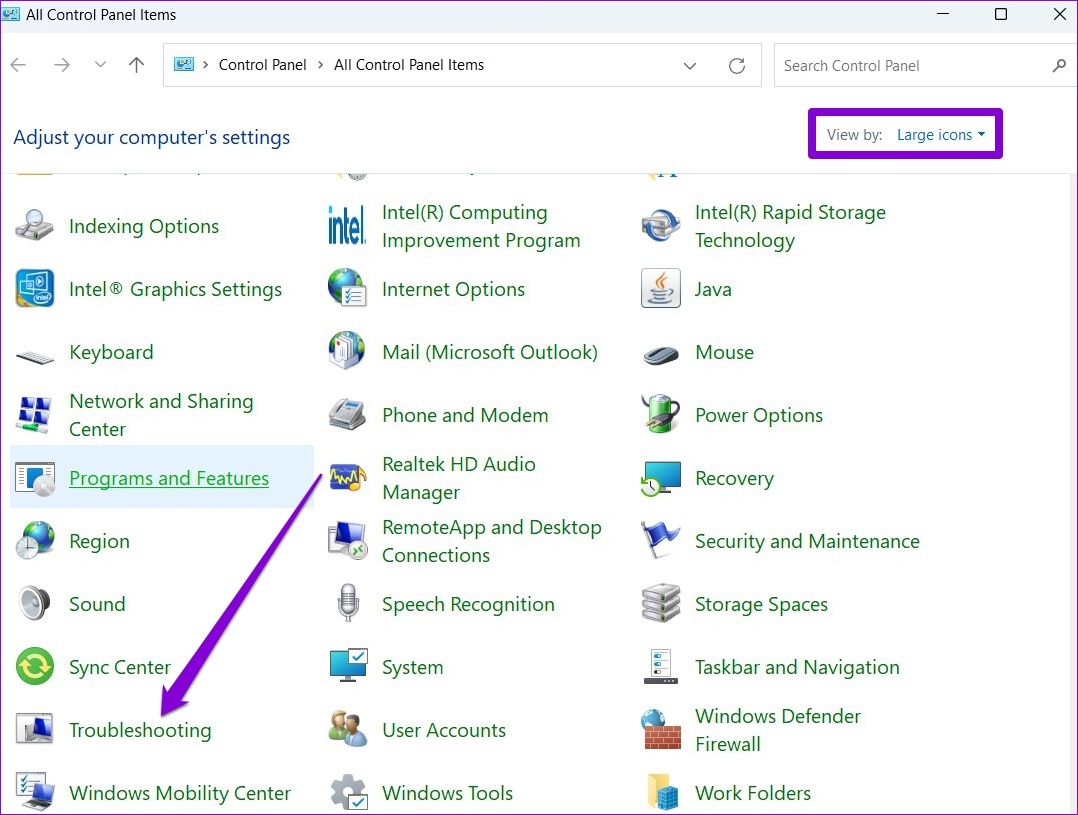
Step 2: In the Control Panel window, switch the view type to Large icons from the top-right corner (if it isn’t already), and go to Troubleshooting.
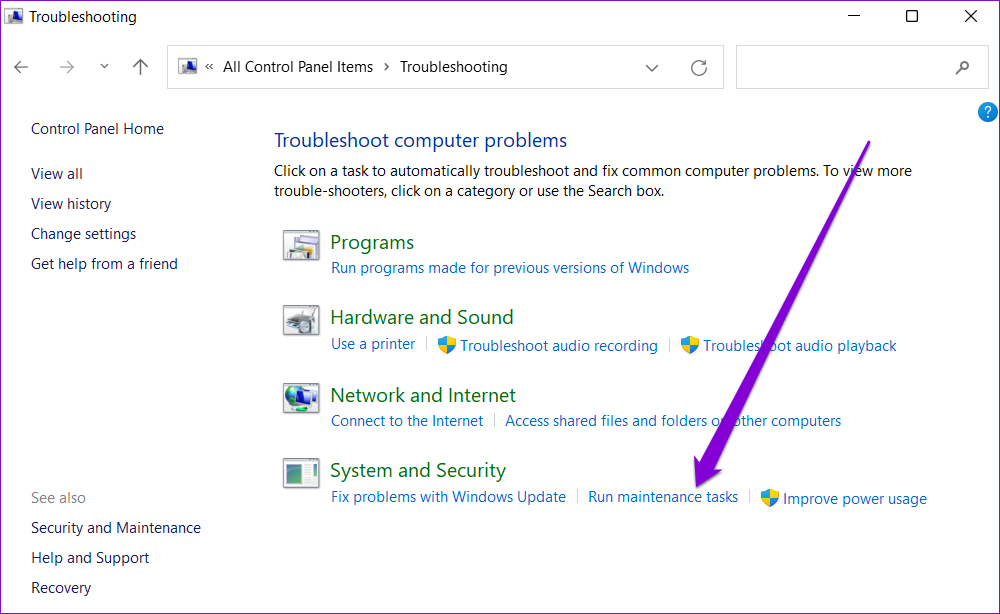
Step 3: Under System and Security, click on the Run maintenance tasks option.
Follow the on-screen instructions to run the troubleshooter and restart your PC. After that, the error should no longer appear.
3. Increase Virtual Memory
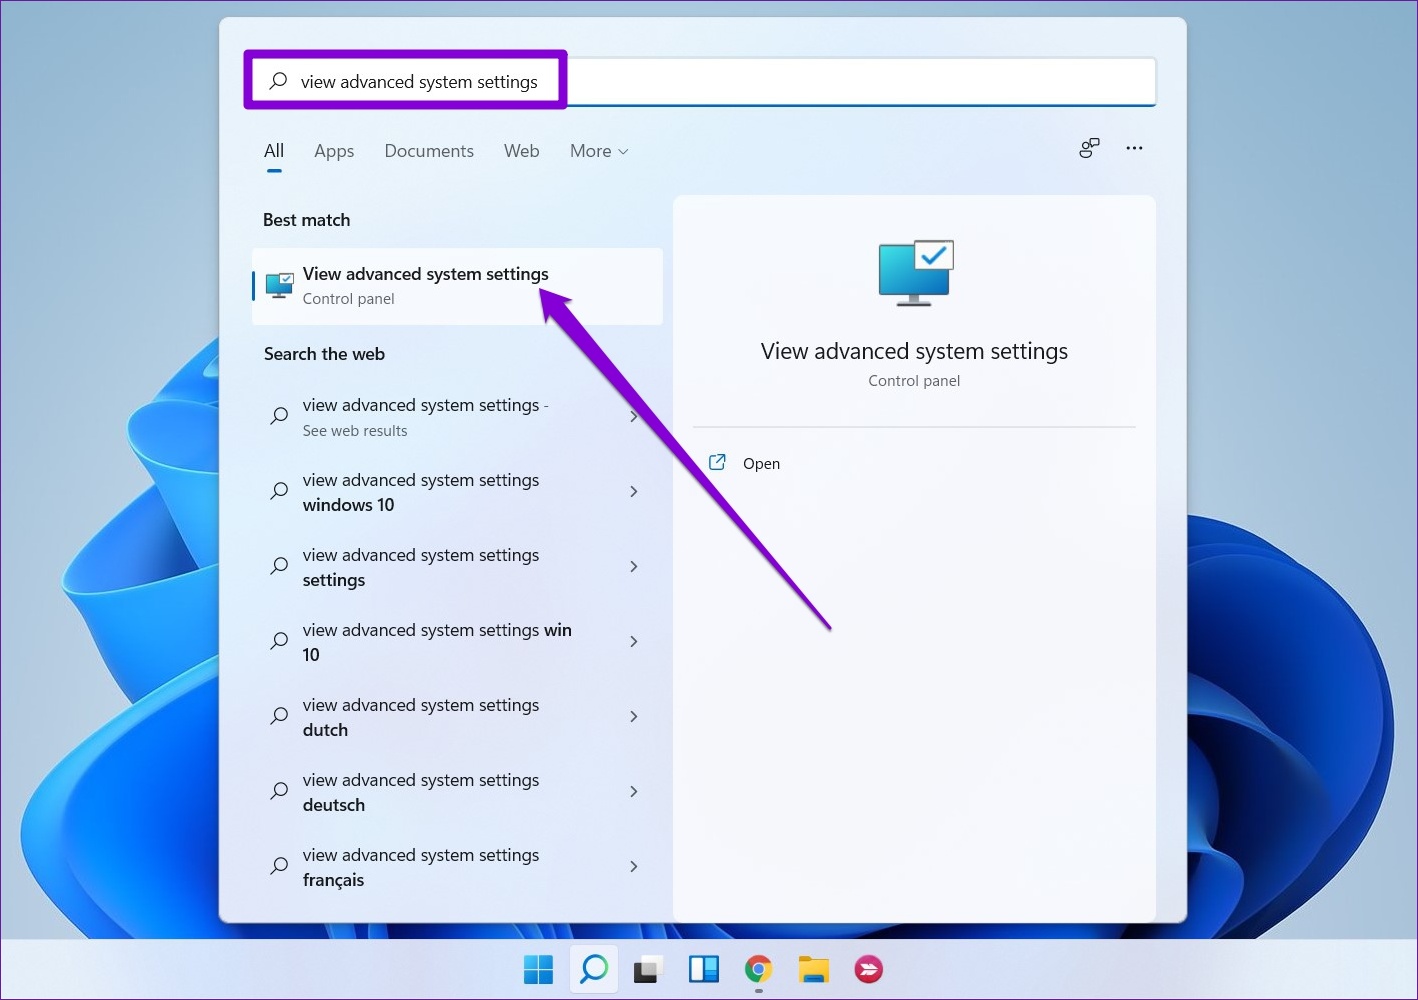
Virtual memory is a nifty feature that allows Windows to temporarily store information on your hard drive that it normally stores in RAM. You can increase the virtual memory size to compensate for physical memory shortage. Step 1: Press the Windows key + S to open the search menu, type view advanced system settings, and press Enter.
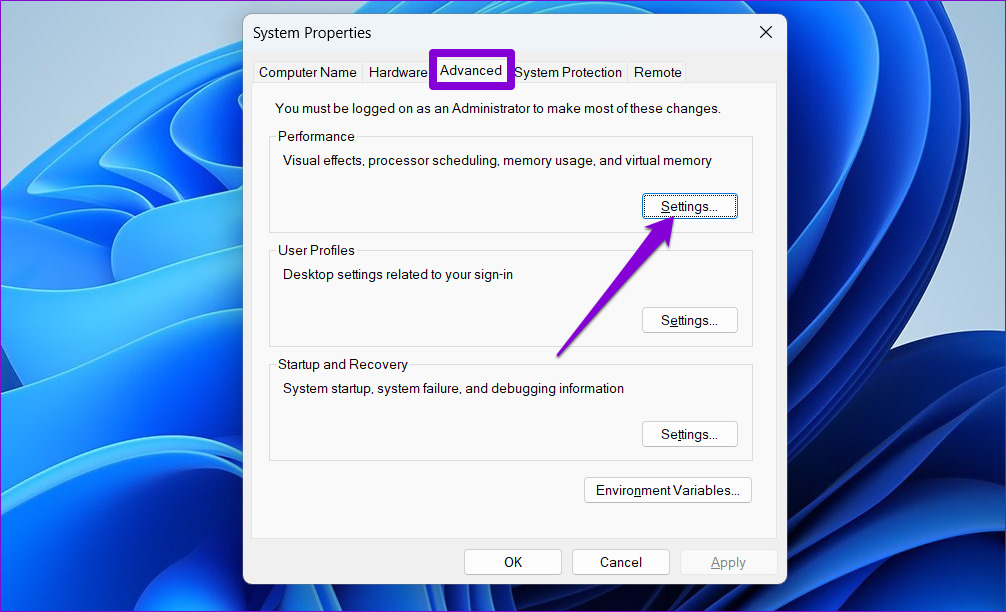
Step 2: Under the Advanced tab, click on the Settings button under Performance.
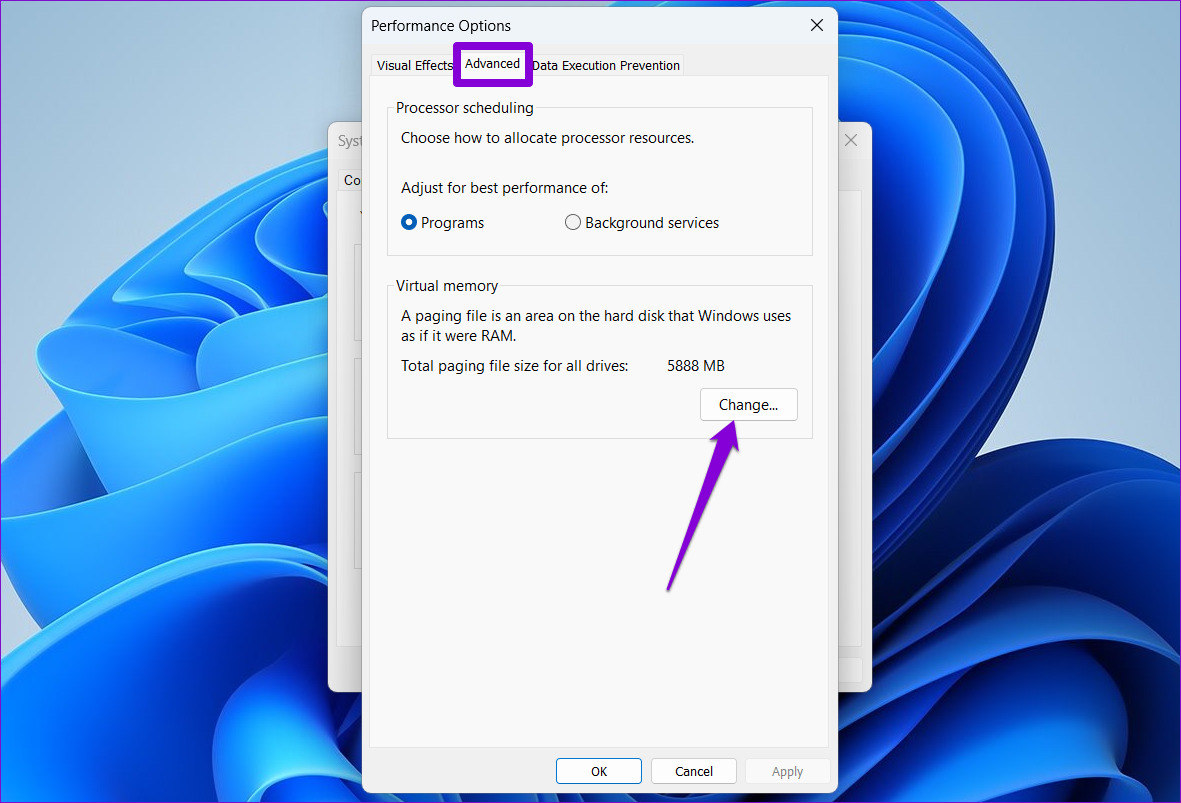
Step 3: In the Performance Options window, switch to the Advanced tab and click on the Change button.
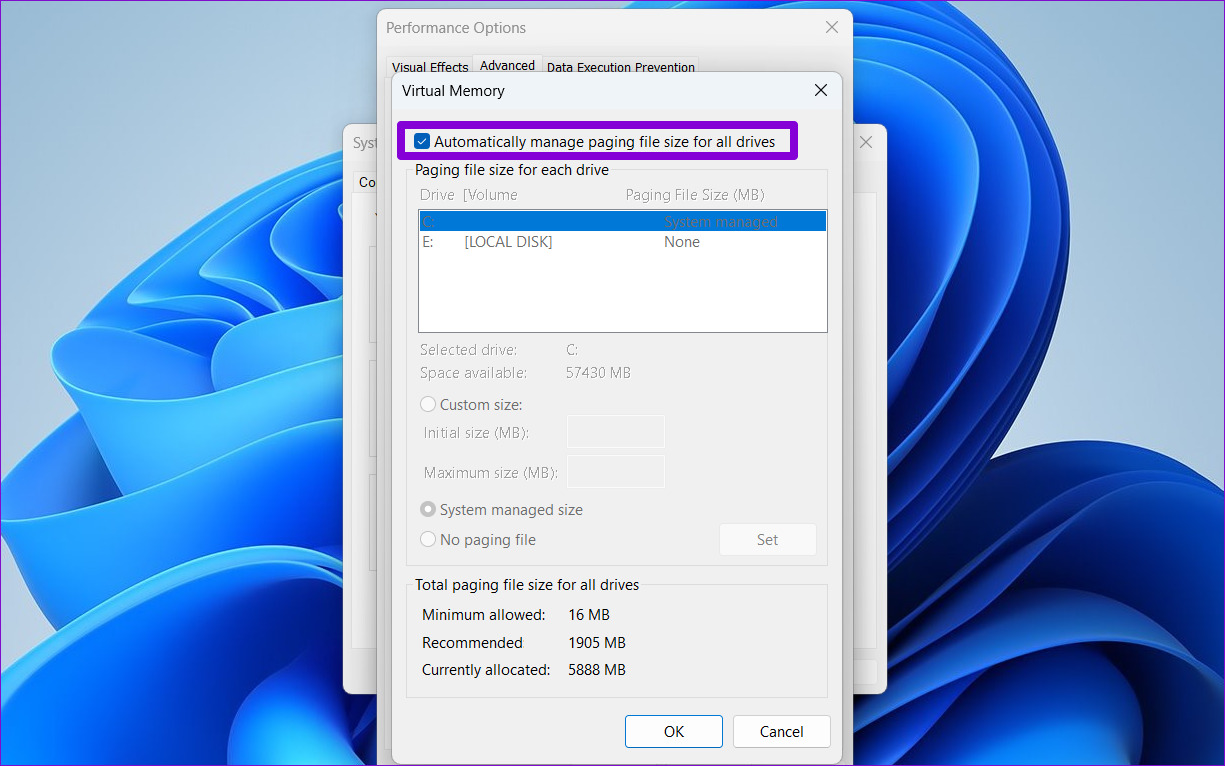
Step 4: Uncheck the ‘Automatically manage paging files size for all drives’ option.
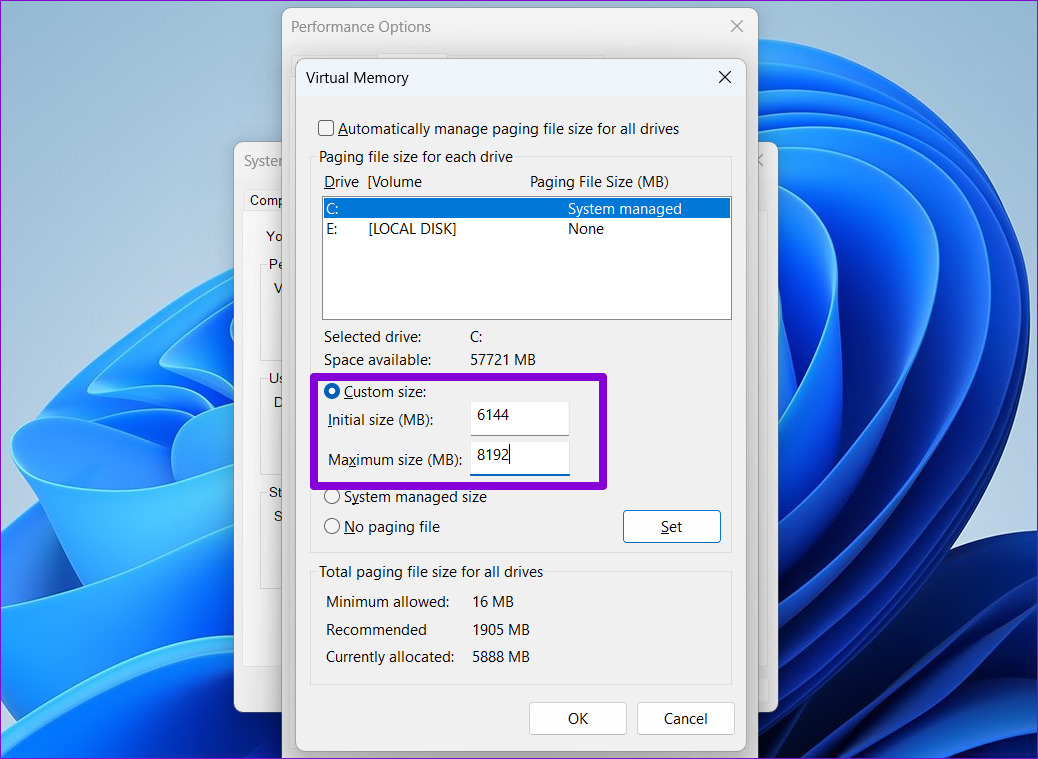
Step 5: Select Custom size and enter the initial and maximum size for the paging file in MB. The initial size should be 1.5 times the size of your RAM, and the maximum size can be up to 3 times the size of your RAM. So, if your PC has 4GB RAM (1GB = 1024MB), the initial size should be 6,144MB, and the maximum size allowed is 12,288MB. However, it’s best practice not to set the maximum size to its upper limit to avoid any slowdowns.
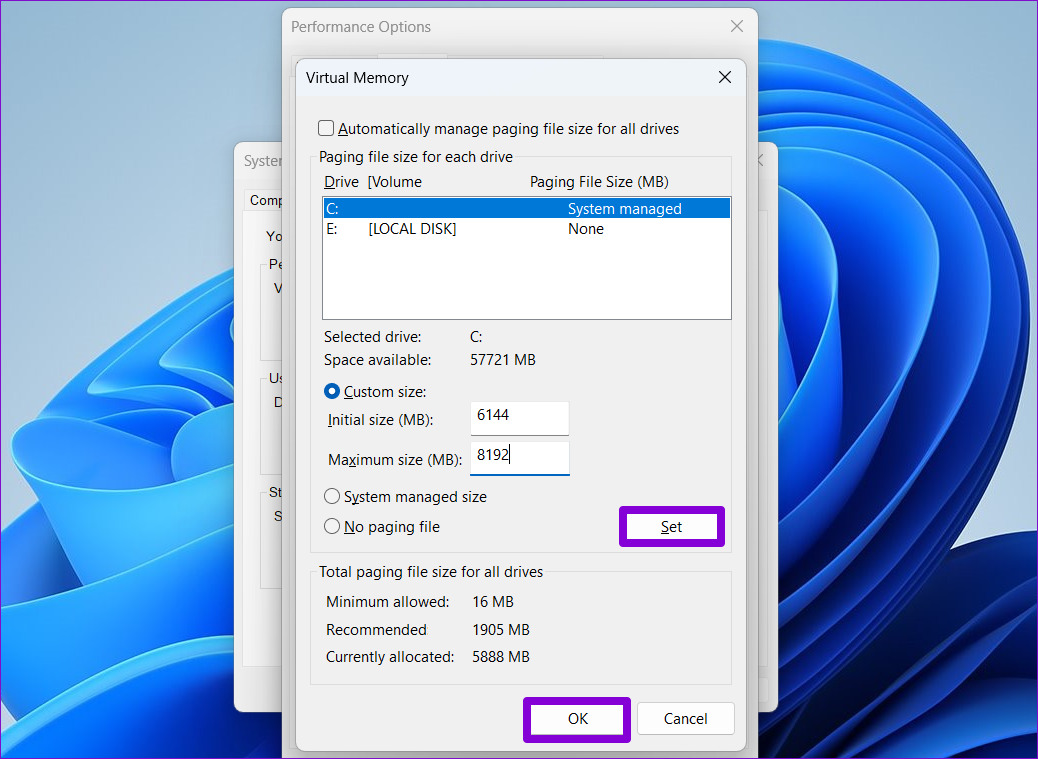
Step 6: Click on Set followed by OK.
After completing the above steps, restart your PC to apply the changes.
4. Use Command Prompt to Check Disk
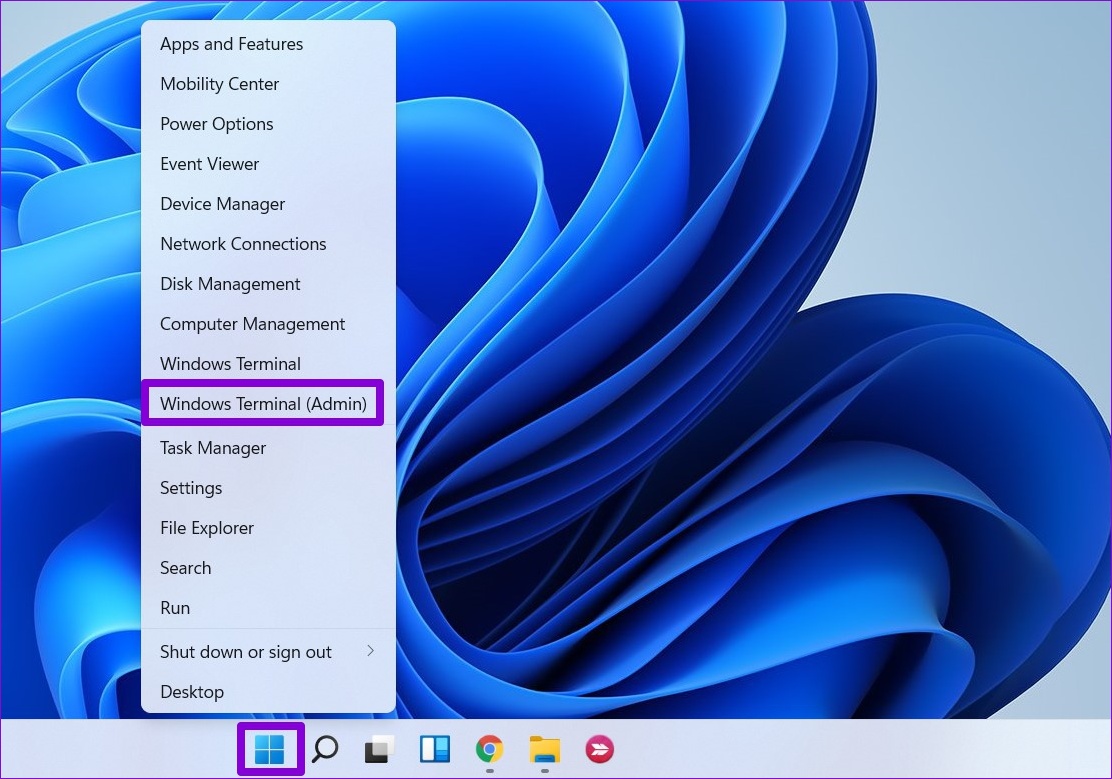
By running the chkdsk (short for check disk) command, you can allow Windows to scan and repair your drive for corrupted data and bad sectors. If the error message is caused by an issue with your hard drive, running the chkdsk command will help. Step 1: Right-click the Start button and select Windows Terminal (Admin) from the list.
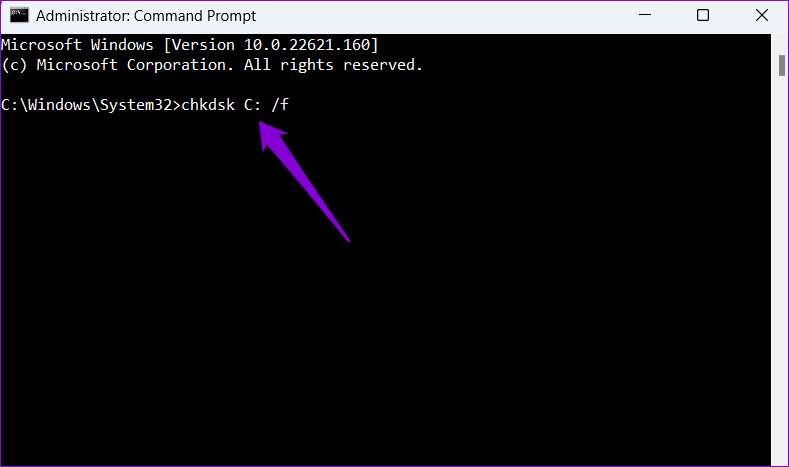
Step 2: In the console, paste the following command and press Enter. Note that the drive letter should be the one you want to check and if its where your Windows is install, it might take a while.
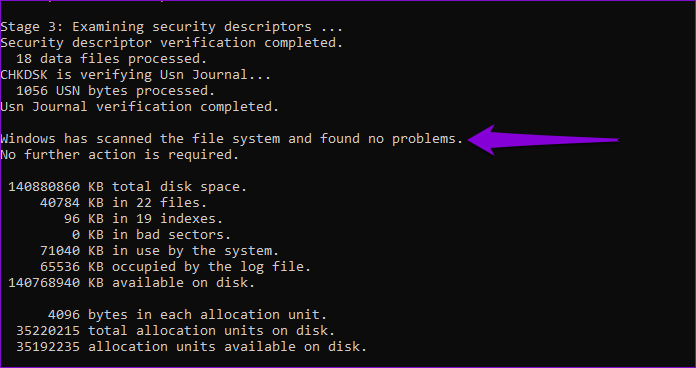
After running the command, check if it detects any problem. Even if no probelms are detected, close the window, restart your PC and check if the ‘Your computer is low on memory’ error occurs again.
5. Delete Temporary Files
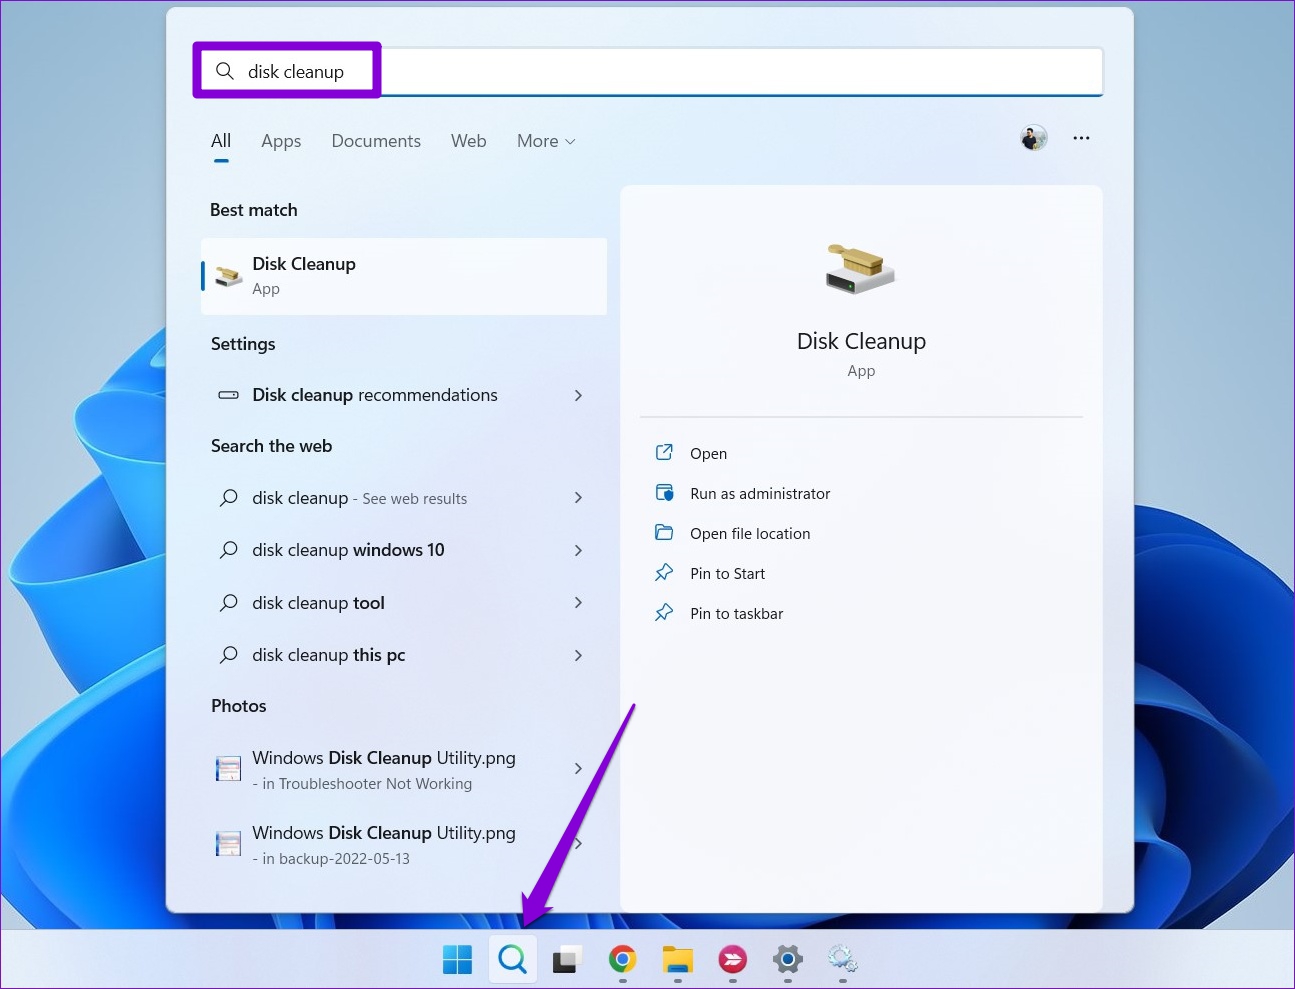
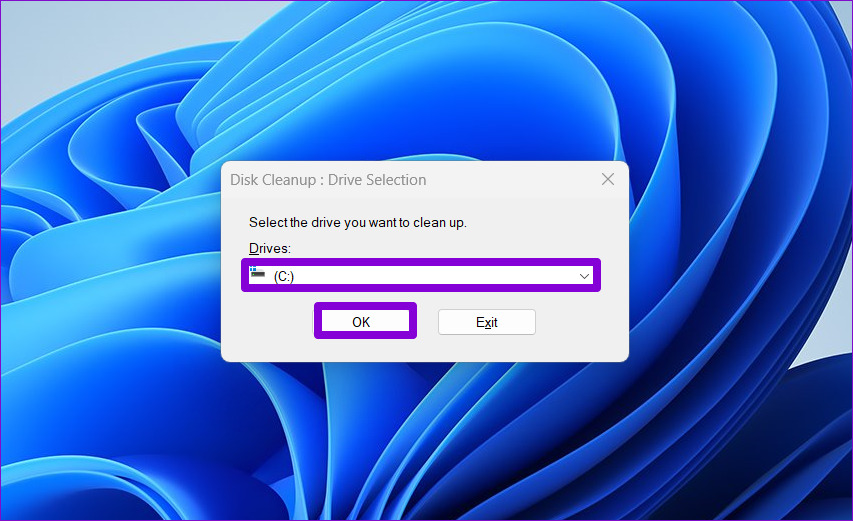
Old temporary files on your PC can also interfere with Windows processes and create problems. You can get rid of such temporary files by running the disk cleanup tool. Step 1: Click on the Search icon on the Taskbar, type in disk cleanup, and press Enter.
Step 2: Use the drop-down menu to select your primary drive and click on OK.
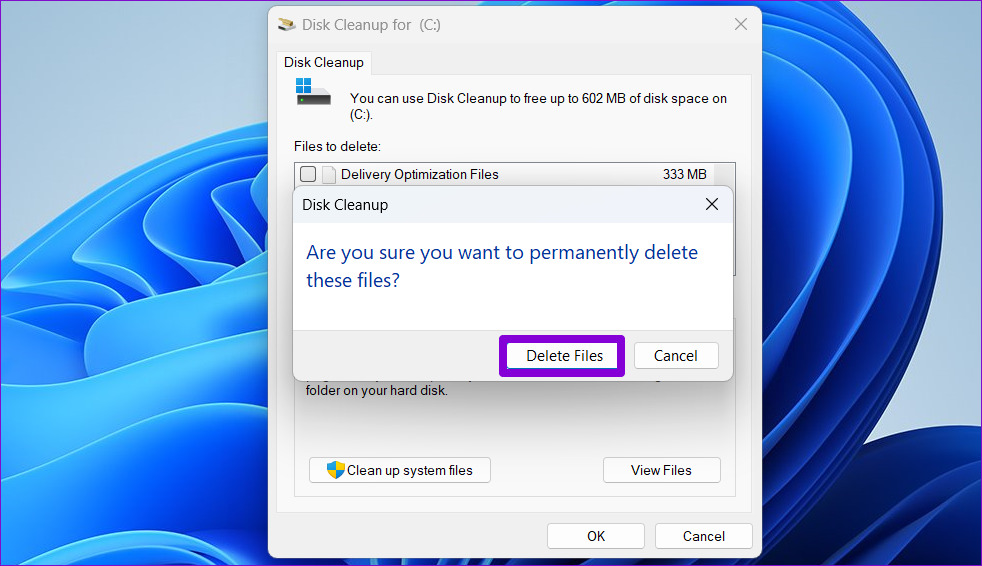
Step 3: Under Files to delete, use the checkboxes to select all the temporary files. Then, click on OK.
Step 4: Choose Delete Files when prompted. Once removed, check to see if the error message occurs again.
6. Run Windows Memory Diagnostic
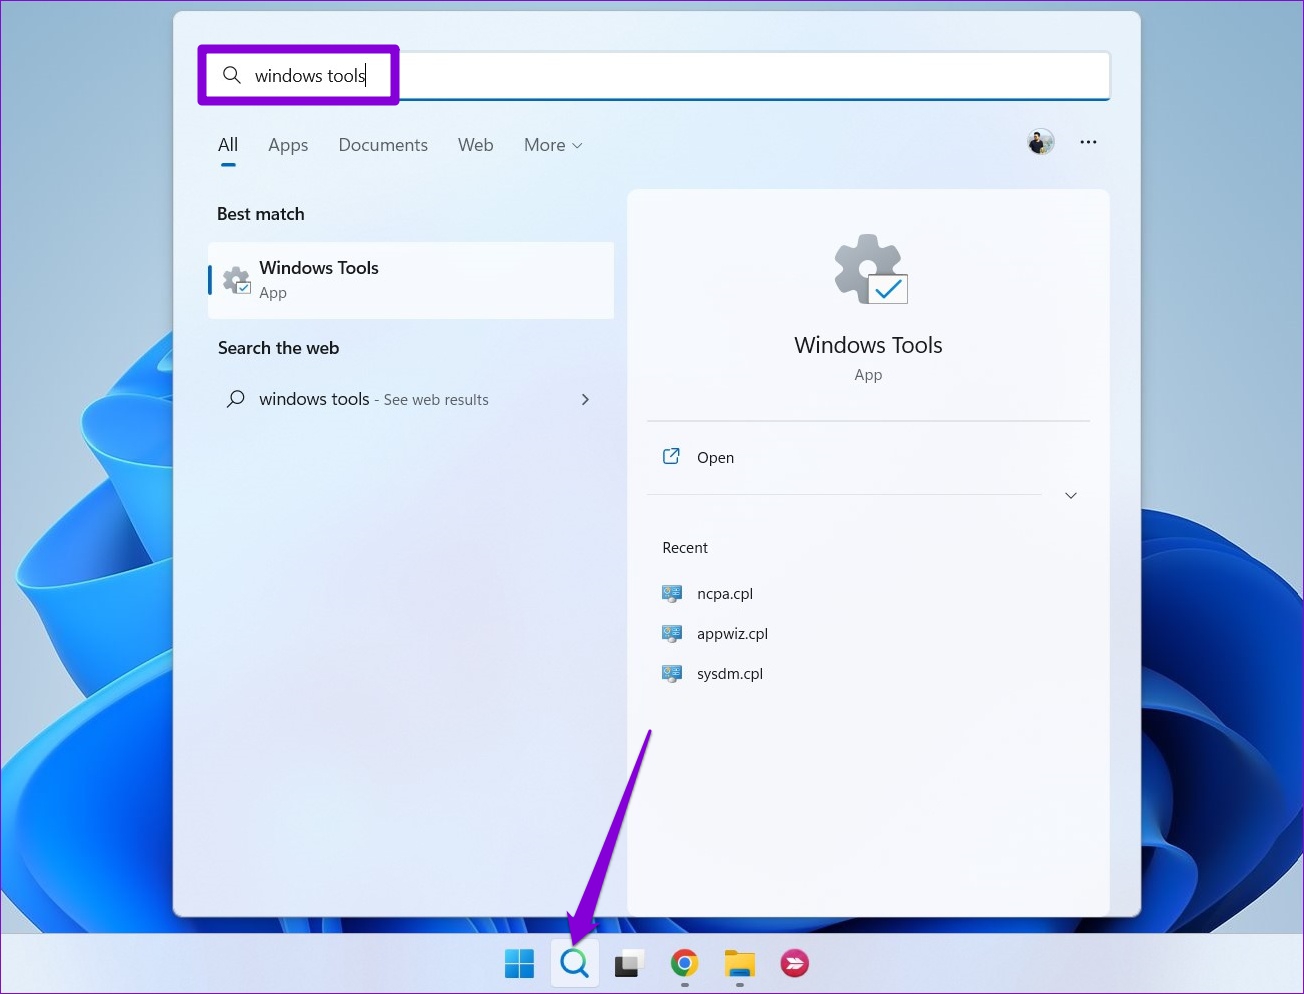
Windows Memory Diagnostic is a handy tool available on all major versions of Windows. It can scan your PC for any memory problems and fix them. Running it requires you to restart your PC, so save all your work before that. Step 1: Click on the search icon on the Taskbar, type in windows tools, and press Enter.
Step 2: Double click on Windows Memory Diagnostic option.
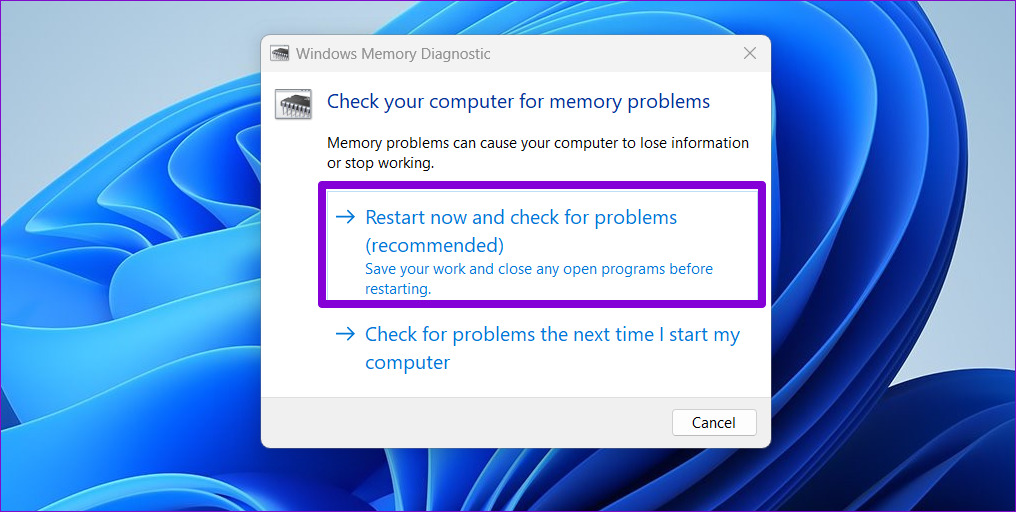
Step 3: Select ‘Restart now and check for problems’ option.
Once the PC reboots, it will run the diagnostic tool and inspect for any RAM issues on your computer.
7. Check for Malware
If none of the methods above work, then there’s a chance that a malware resides on your PC. You can run a system scan with the Windows Security app or a third-party antivirus program you trust to eliminate this possibility.
Perfectly Balanced
It’s frustrating when Windows keeps interrupting you with a ‘Your computer is low on memory’ error while you’re working. We hope that the above solutions have helped you eliminate the error. However, if you continue to encounter such errors regularly, you should consider adding more physical RAM to your machine. The above article may contain affiliate links which help support Guiding Tech. However, it does not affect our editorial integrity. The content remains unbiased and authentic.
