However, NFC Tag Reader feature isn’t part of every iPhone model. Apple brought the NFC Tag Reader in 2014 with the iPhone 6. Subsequent iPhone models come with an expansion of the NFC Tag Reader. Here’s how you can access the NFC Tag Reader and use it:
How to Use the NFC Tag Reader on an iPhone
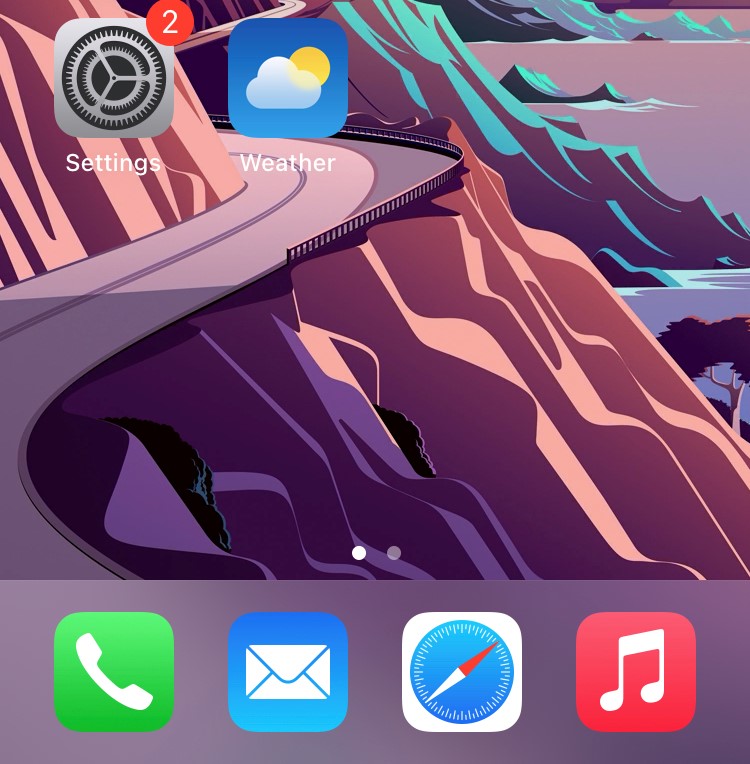
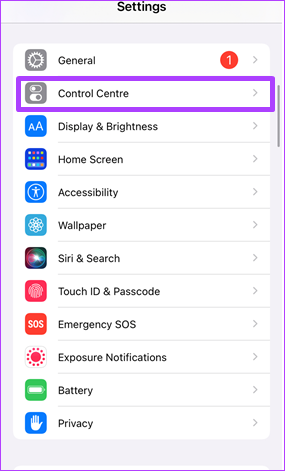
The following iPhone models have the NFC tag reader: iPhone SE (2020), iPhone 6s and 6s Plus, iPhone 7 and 7 Plus, iPhone 8 and 8 Plus, iPhone X, iPhone XR, iPhone XS and XS Max, iPhone 11, iPhone 11 Pro, and iPhone 11 Pro Max., iPhone 12, iPhone 12 Pro, iPhone 12 Pro Max, and iPhone 12 Mini, iPhone SE (2022), iPhone 13, iPhone 13 Pro, iPhone 13 Pro Max, and iPhone 13 Mini. The iPhone models released since 2018 come with a Background Tag Reading feature to work with the NFC tags. With this feature, you do not have to tap the NFC Tag Reader option before your iPhone starts searching for data. Instead, you only need to keep iPhone screen on, and it automatically searches for NFC tag data. Though Apple iPhone 6 has an NFC chip, its functions are limited. The iPhone 6 users cannot utilize the NFC feature for scanning or encoding tags. However, the NFC feature on iPhone 6 only allows making payments. For iPhone 7 till iPhone X models, the NFC tag reader should be within the Control Center of your iPhone by default. If it’s not, take the following steps to add the NFC Tag Reader to your iPhone’s Control Center: Step 1: Tap the Settings app on your iPhone.
Step 2: Scroll down the Settings menu and tap on Control Center.
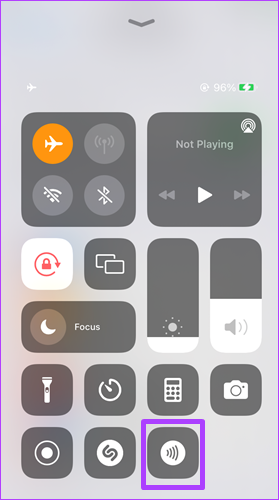
Step 3: Scroll down to the More Controls group and tap on the green + on the left side of NFC Tag Reader.
Step 4: Swipe up on your screen to launch the Control Center. Step 5: Tap the NFC tag reader icon, which looks like live waves.
Step 6: Place your device close to a tag, and it should read the data on it. To use the NFC Tag Reader for data transmission, the distance between the iPhone and the NFC tag must be 1.5 inches or 4 centimeters.
How to Create a Shortcut Automation via NFC Tag Reader
If you are using an iPhone model XR and above with at least iOS 13, you can create shortcut automation using the NFC Tag Reader. What this means is that you can automate certain actions on your iPhone by linking to a tag and then triggering the action using the NFC tag reader. The process is pretty simple, check out the steps below: Step 1: Tap the Shortcuts app on your iPhone.
Step 2: Tap on Automation, located at the bottom of the screen.
Step 3: Tap Create Personal Automation.
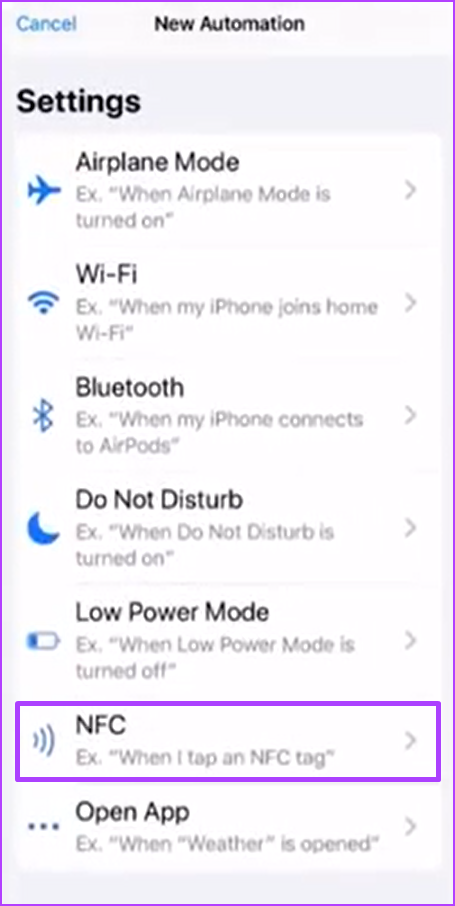
Step 4: Scroll down the options displayed and tap on NFC to be the trigger for your new automation.
Step 5: Tap on Scan, then hold your device over an NFC tag/sticker.
Step 6: Name the tag, then tap Next, located at the top-right of the screen.
Step 7: Tap Add Action to assign an action to the scanned sticker.
Step 8: Choose any action from one of the suggestions or categories available. Step 9: Tap Done to confirm your selection.
After setting up the automation, you can position the NFC sticker in an area where you use your device frequently. Perform the actions by simply holding your iPhone close to the tag. Besides the native NFC tag reader option, you may also try out several third-party NFC tag reader from the Apple App Store. However, we can’t guarantee seamless experience with such apps.
Using an Apple AirTag
Using the steps above, you should be able to use the NFC Tag Reader for data exchange, payments and also automate simple tasks on your iPhone with an NFC tag. Also, once the NFC Tag Reader has been set up on your device, you can also consider the use of Apple AirTags. These Apple AirTags, can serve as trackers for items such as your wallets, pets, car keys, devices etc. The above article may contain affiliate links which help support Guiding Tech. However, it does not affect our editorial integrity. The content remains unbiased and authentic.
