Samsung Galaxy Phones like the Galaxy S22 pack an alternative feature called Object Eraser. The feature is built right into the default Gallery app on some Samsung Galaxy phones and it works like a charm. Here’s how you can use Object Eraser to edit your photos and remove unwanted objects or people.
What Is Object Eraser
Object Eraser is a photo editing tool usable remove unwanted objects and people from a picture that you’ve already clicked on your phone. Let’s say you’ve clicked a selfie but it has some people you don’t know in the background. You can use Object Eraser to remove them from the photo. Recently, Samsung has even added the ability to remove shadows and reflections from photos using Object Eraser. This makes it a powerful tool to edit and change the look of your pictures.
How to Update Samsung Gallery
Before we tell you how to use Objective Eraser effectively, it’s important to update the Gallery app on your Samsung phone to the latest version. This will ensure you have all the latest features of Object Eraser. Step 1: Open the Galaxy Store app on your Samsung phone.
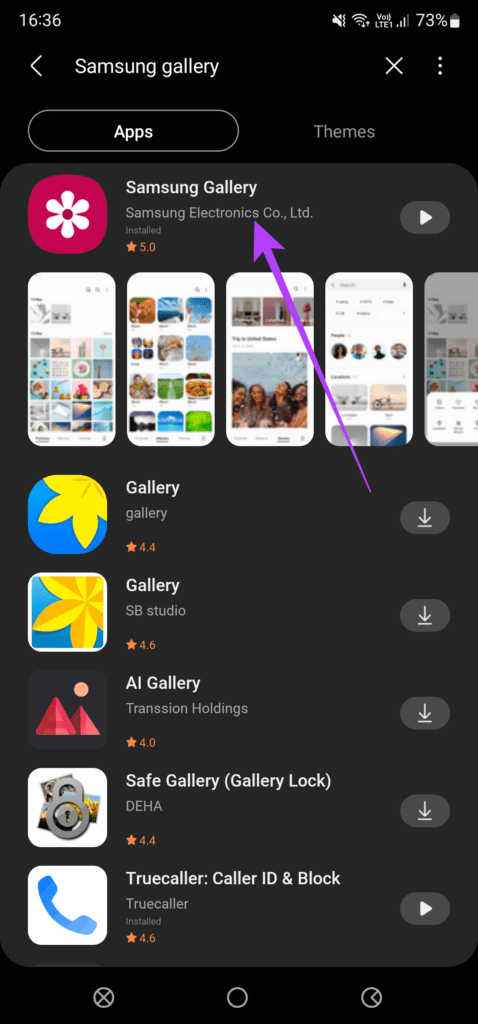
Step 2: Search for Samsung Gallery using the search bar at the top. Open Samsung Gallery app
Step 3: Select the first option and go to the app page.
Step 4: Update the app if there is a newer version available.
How to Remove Objects and People Using Object Eraser
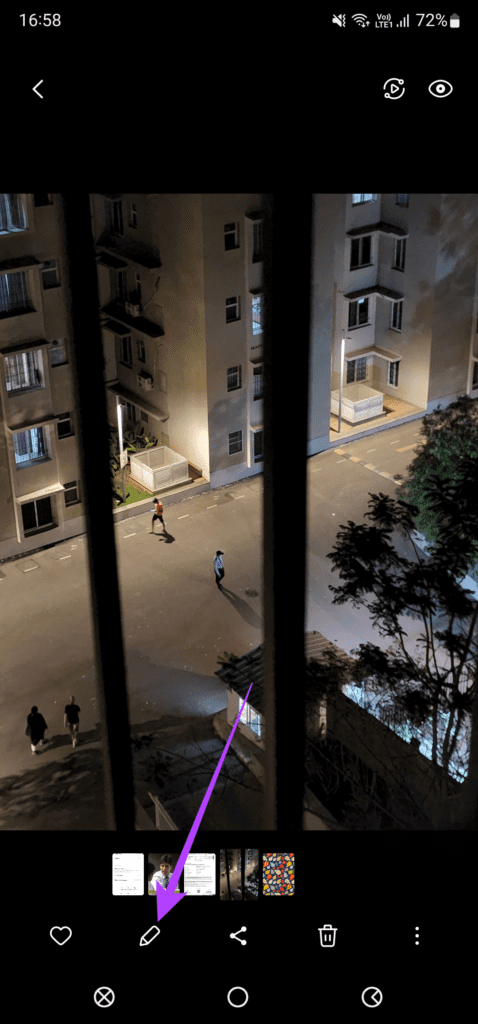
Now that you have the latest version of the Samsung Gallery app, all the features in Object Eraser will be available. Here’s how to use it. Step 1: Open the picture you want to edit on the Gallery app. Step 2: Tap on the edit icon present on the bottom bar.
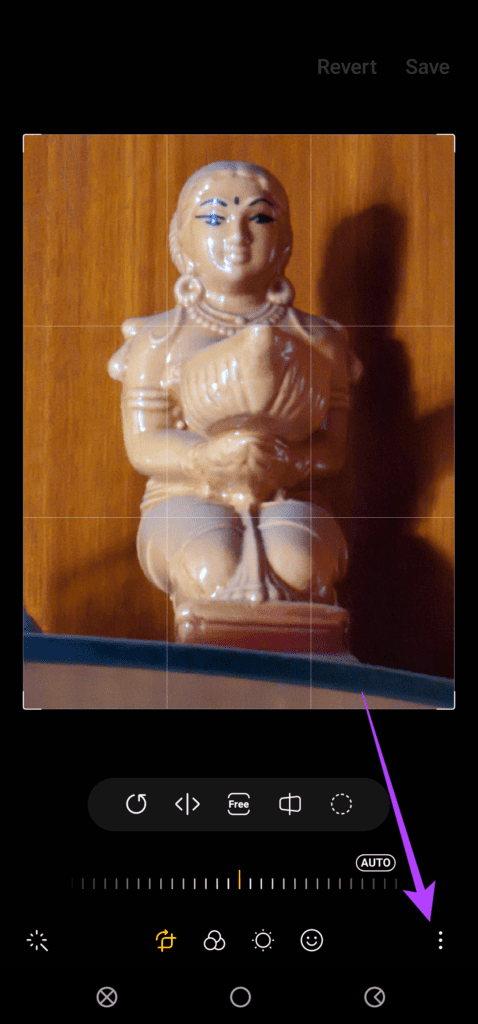
Step 3: Select the three-dot menu in the bottom-right corner.
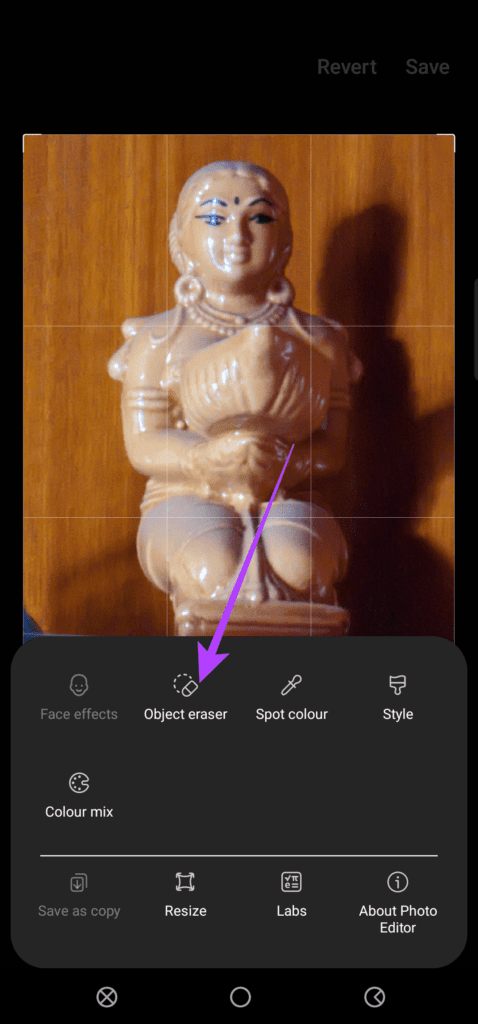
Step 4: Next, tap on Object Eraser.
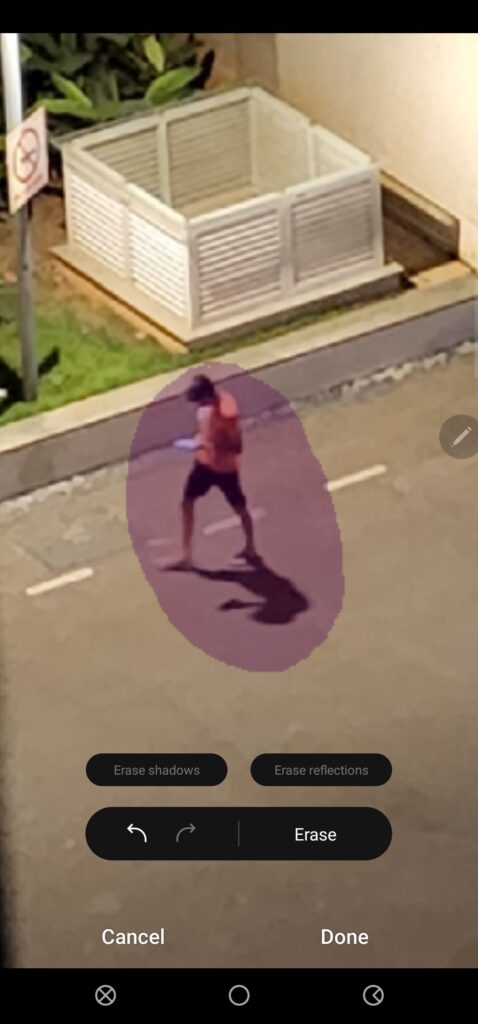
Step 5: You can select or draw around objects that you want to erase from the photo. If your Samsung Galaxy phone supports the S Pen, use it to draw around objects for precision.
Step 6: To select smaller objects more accurately, you can also zoom in and draw around them. Step 7: After selecting all relevant objects, tap on Erase.
Step 8: Wait for the process to complete and your selected object will be erased. Repeat the same procedure for all the objects you want to erase.
Step 9: Once you’ve erased all the objects, tap on Done.
Step 10: Select the Save option in the top-right corner. The phone will remove the objects you select and save the finale image.
How to Remove Shadows and Reflections Using Object Eraser
Apart from removing unwanted components like objects and people, Object remover can even remove shadows and reflections and improve the look of your photos. Here’s how to use it. Step 1: Open the picture you want to edit on the Gallery app. Step 2: Tap on the edit icon present on the bottom bar.
Step 3: Select the three-dot menu in the bottom-right corner.
Step 4: Now, tap on Object Eraser.
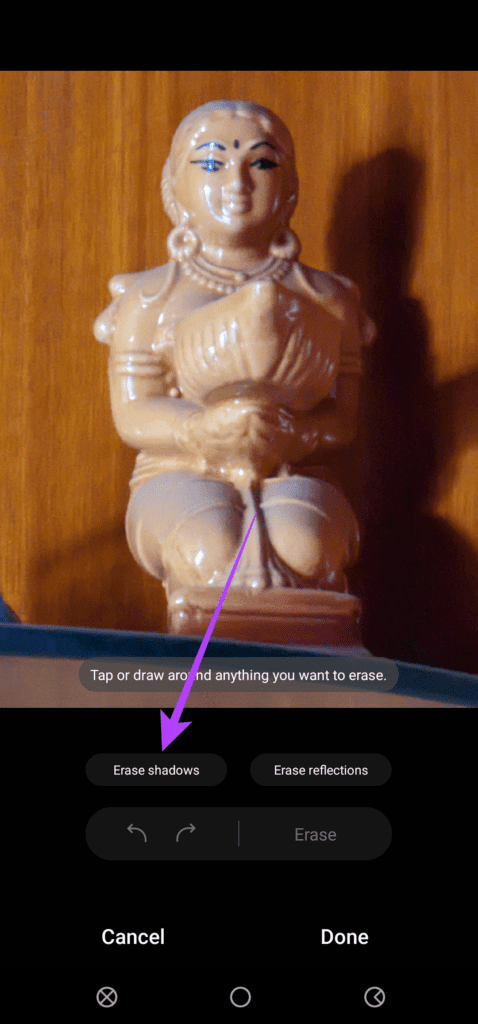
Step 5: Instead of drawing around an object, tap on the Erase reflections or Erase shadow button depending on what action you want to perform.
Step 6: In this image, you can clearly see that there is a shadow of the object cast in the background. So, clicking the Erase shadow button will attempt to remove it. Step 7: The process will take place and the shadow is removed.
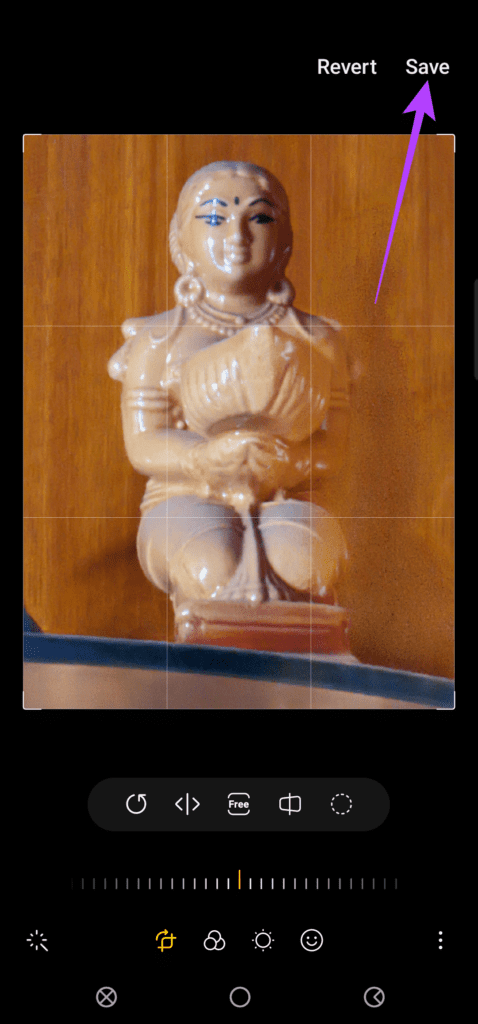
Step 8: Tap on Done. Step 9: Select the Save option in the top-right corner. Your edits will be saved and your final image will not have any shadows.
As you can see, the final image is not as polished and has a few blemishes. The result that you will get from this feature will depend on various factors like the complexity of the subject, the lighting, and the background. In this case, the subject’s color was very similar to that of the background. So, it’s harder for the software to establish a proper separation. You can try using different images and let us know about your experience with this tool in the comments
Remove Unwanted Objects and People From Your Photos
If people are photo-bombing your picture, you can quickly use the object eraser to remove them or any other unwanted elements from your photos. This will help you achieve a cleaner look before posting the photos on social media. The above article may contain affiliate links which help support Guiding Tech. However, it does not affect our editorial integrity. The content remains unbiased and authentic.