We tested this feature on an iPhone 13 running on iOS 16 Public Beta. The Photos app is also available on the iPad, so the steps for solutions in this post work on iPadOS 16 and later.
What Are the Benefits of This Feature
Imagine someone photobombing your selfie or a photo of a view that you’ve taken. While the obvious solution is to crop a photo, that isn’t ideal at times. The portion you want to remove from the background can be a human, animal, or object. However, the iPhone will let you take out the subject and remove the background entirely. That means you can focus on the person, animal, or object in the photo and use a different background. Several free websites that claim to it for you in two clicks, but you can never be sure about their privacy policy and the security of your photos. Plus, those websites were not very efficient in separating the background from images. With iOS 16, you can perform the same action without letting the photo leave your phone.
How to Use This Feature on iPhone
You can remove the background from an image after clicking a picture or in your existing photos. The process to lift an image from the background remains the same. But you have to ensure a somewhat clear separation between subject and background. Follow these steps. Step 1: Click a picture from your iPhone or open the Photos app to select an existing picture. Step 2: Long press on the subject and wait till you notice a white border animation covering the subject.
The white border animation indicates that the app has selected the subject from the background. Step 3: You can now choose between two options – Copy or Share.
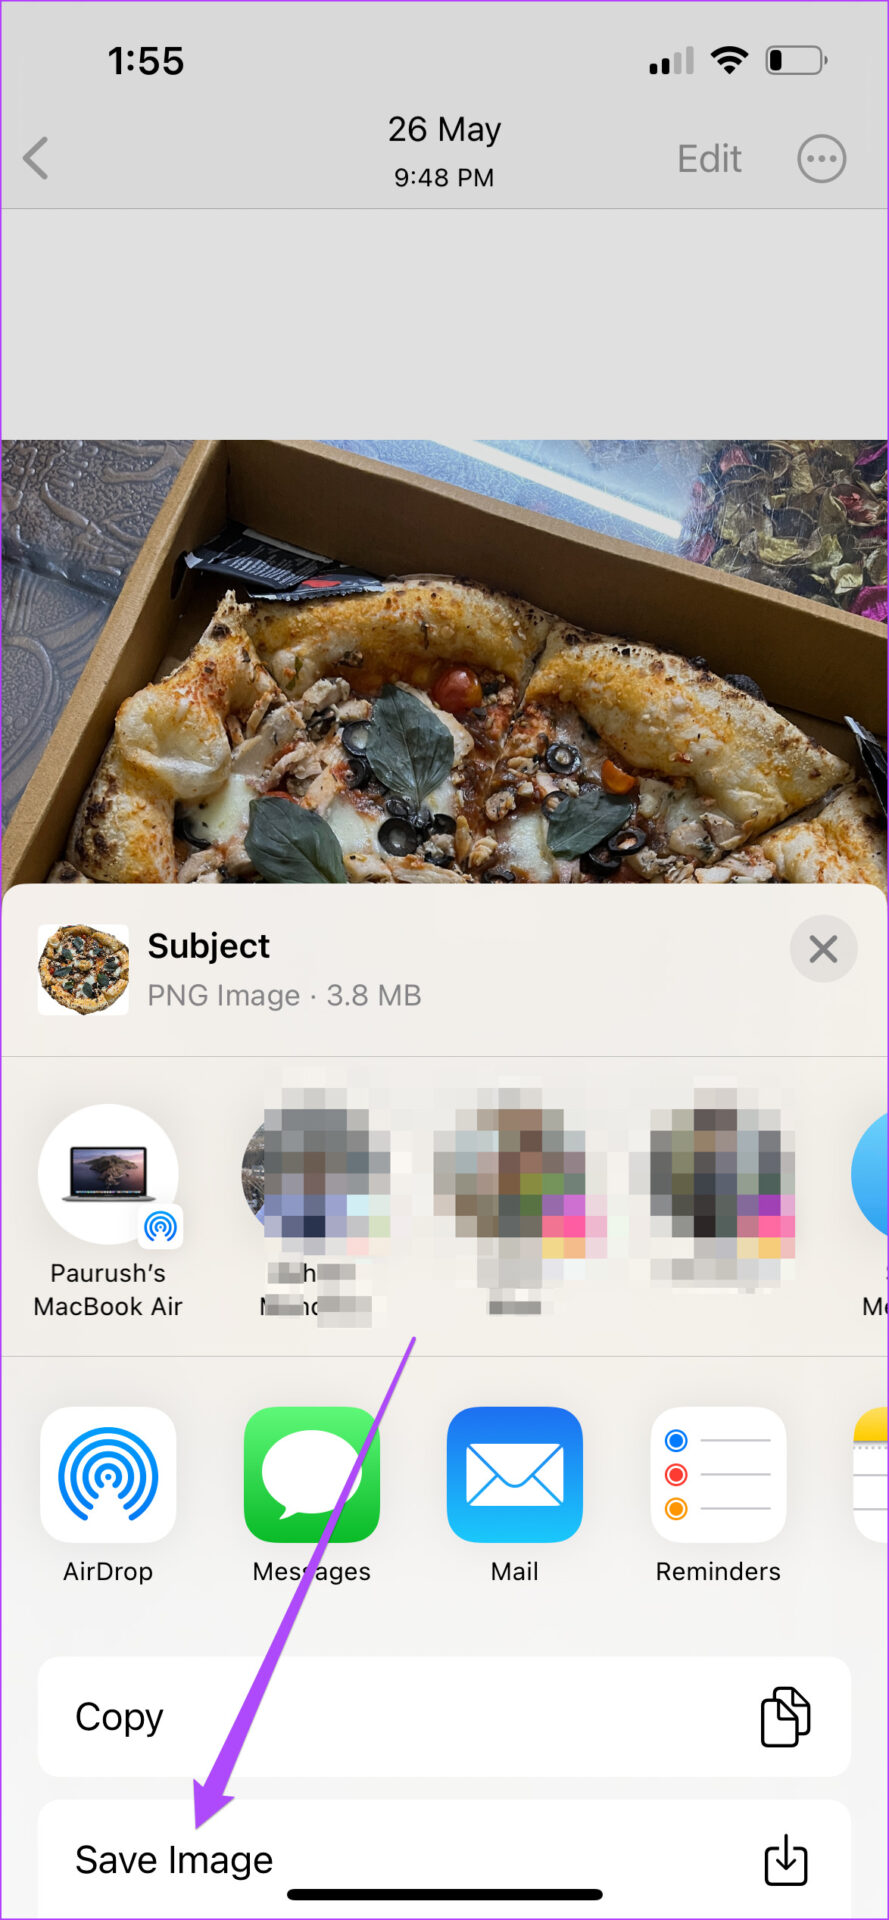
Step 4: Tap on Share.
Step 5: From the list of Share options, tap on Save Image.
The Photos app will save the cutout as a PNG file.
Let us show you how to cutout the subject and use it directly in different apps on your iPhone.
Share the Cutout in iMessage
Step 1: Open your image or click it from your iPhone camera. Step 2: Once you see the white border animation around your subject, tap on Share.
Step 3: From the Share options on your screen, tap on Messages.
A new Message prompt will open your screen. You will see the subject cutout already attached as a message.
Step 4: Enter the name or number of your contact.
Step 5: Tap the blue arrow icon to send it.
Save the Cutout in the Notes app
Step 1: Open your image or click it from your iPhone camera. Step 2: Once you see the white border animation around your subject, tap on Share.
Step 3: Swipe right and tap on Notes.
The Notes app will open on your screen. The app will prompt you to save the subject cutout as a New Note.
You can tap on New Note and select your Notes folder location.
After selecting the folder name, tap on Create New Note.
Step 4: Type your text for the note and tap on Save.
Step 5: Close the Photos or Camera app and open Notes to check your cutout saved as a Note.
Share the Cutout on WhatsApp
Step 1: Open your image or click it from your iPhone camera. Step 2: Once you see the white border animation around your subject, tap on Share.
Step 3: Swipe right and tap on More.
Step 4: From the list of Apps, scroll down and select WhatsApp.
The list of your WhatsApp chats will pop up on your screen. You can also set the PNG file as your WhatsApp Status. Step 5: Select your contact and tap Next.
Step 6: Tap the blue arrow icon to send.
Remove Background From an Image on iPhone
Separating the background from images will become very easy if your iPhone runs iOS 16 or above. It’s entirely up to you whether you want just remove background and use the image as is or want to add a new background for the choose subject. The above article may contain affiliate links which help support Guiding Tech. However, it does not affect our editorial integrity. The content remains unbiased and authentic.