To access the audio playback feature, you need to insert the audio file into your document. The process to insert the audio into your document is a little like what you would follow to insert a picture. Here’s how it works.
Inserting Audio Files into Microsoft Word
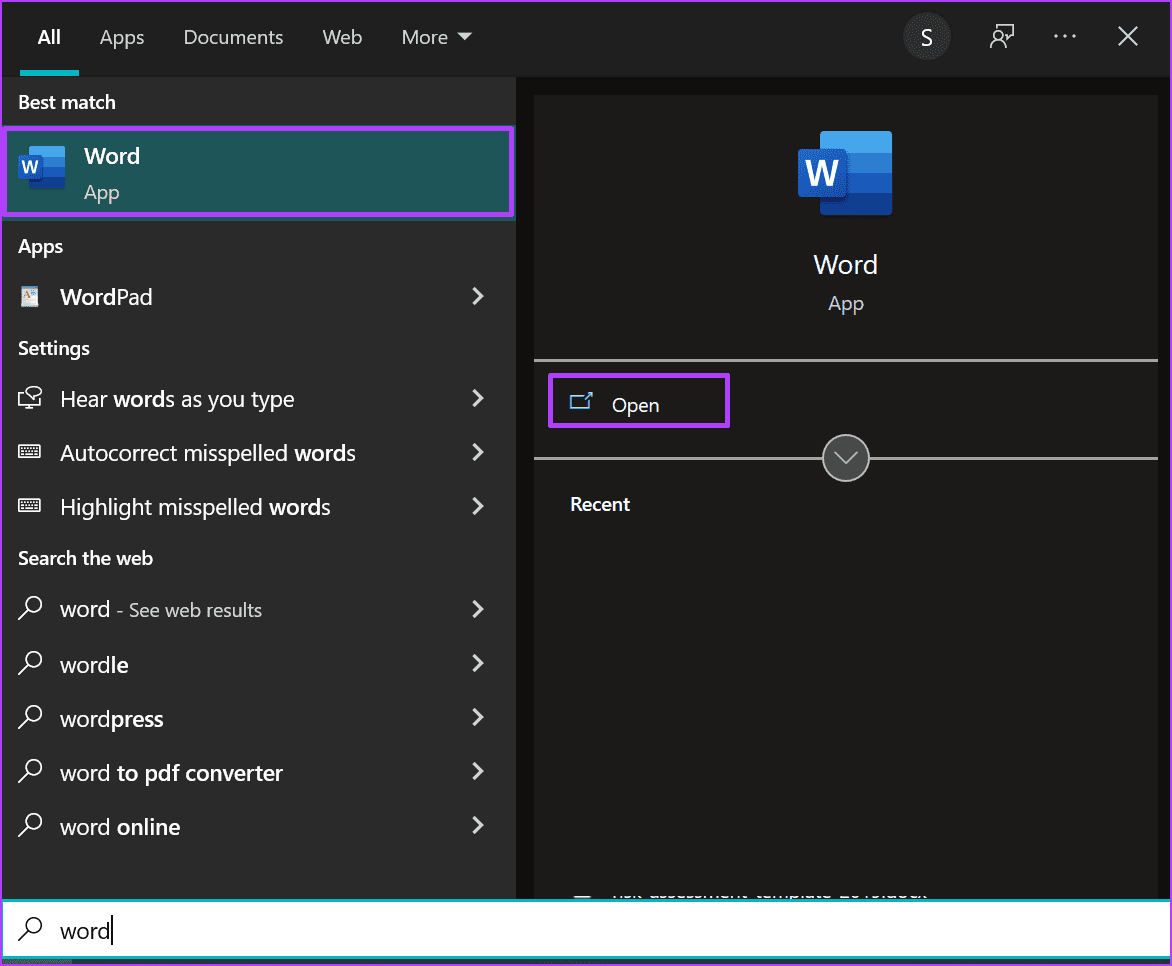
Now, if you’re inserting an audio file into Microsoft Word, the first thing to do is get your audio file ready. For Windows PCs, a Voice Recorder app always comes with the operating software and can be used to record audio. While on Mac, you have the Voice Memos app. If the audio file is not a sound recording, ensure you already have the audio saved on your device. Here are the steps to follow to insert the audio file: Step 1: On your PC, click on the Start menu and search for Word.
Step 2: Click on the Word app from the results or the Word document you need to add audio to.
Step 3: Place the cursor on the part of the document where you need to insert your audio file.
Step 4: Go to the ribbon and click on the Insert tab.
Step 5: Within the Text Group, click on Object.
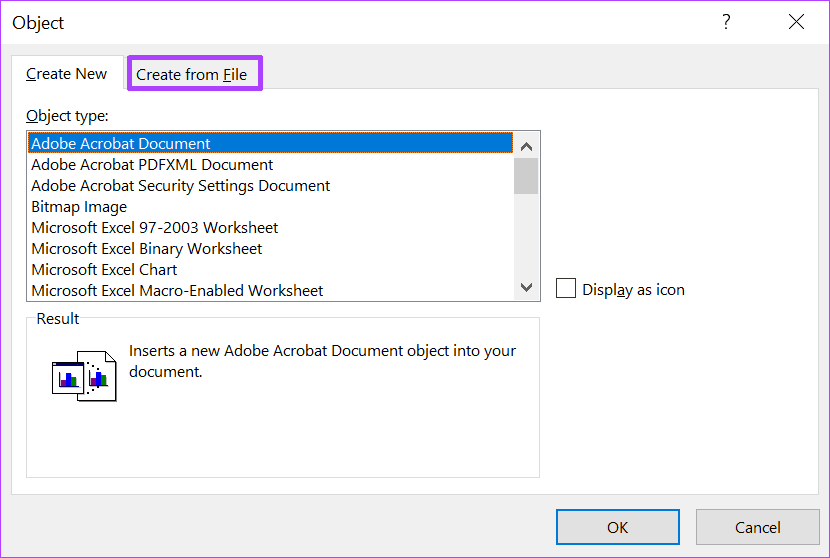
Step 6: Click on Object from the drop-down to launch a dialog box.
Step 7: Click on the Create from File tab.
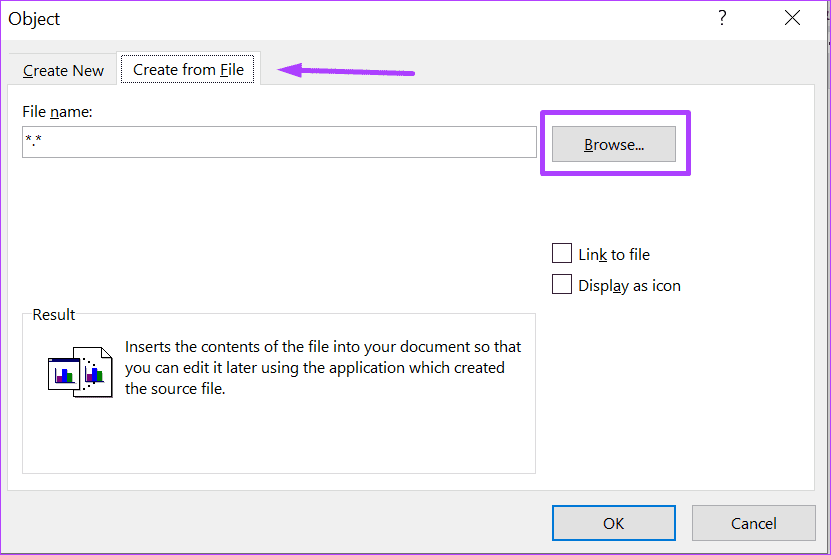
Step 8: Click on Browse.
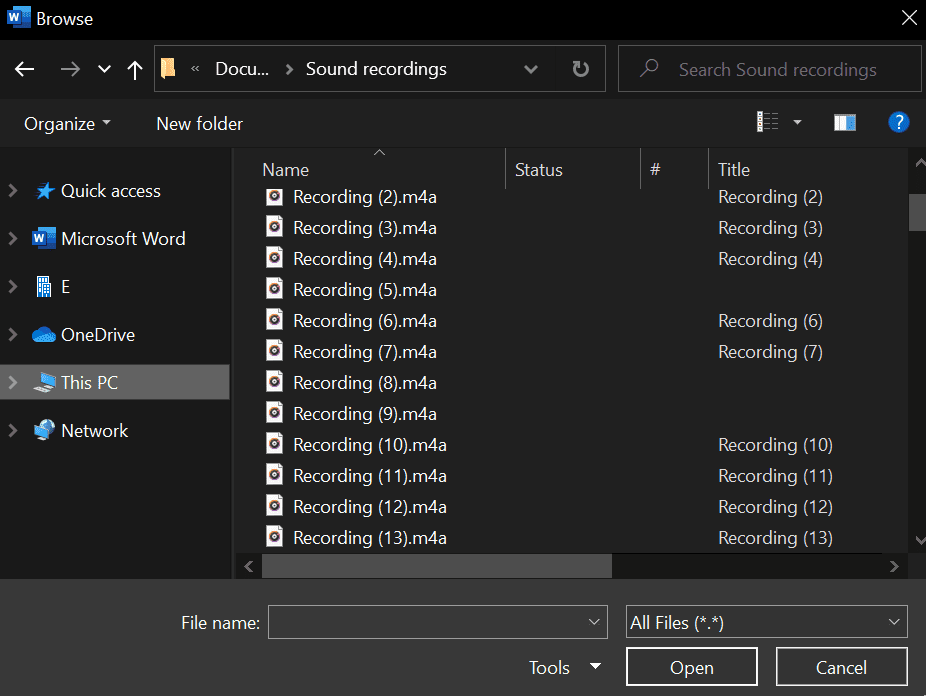
Step 9: Navigate to the location of the audio file (usually in WAV or MP3 format). Click on the file to select it, and the name should appear in the text box.
Step 10: Click on Insert, located in the bottom-right corner of the dialog box.
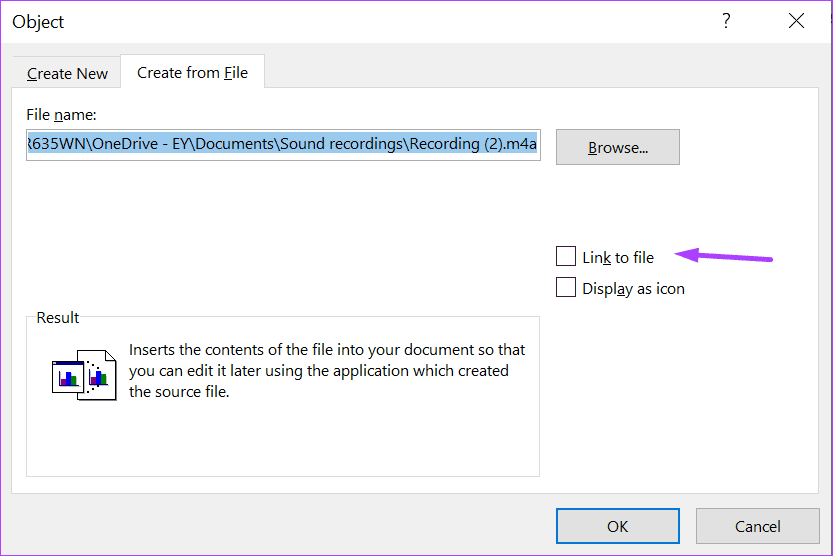
Step 11: Back in the Object dialog box, tick on Link to file if you prefer to create a link to the file instead of embedding it.
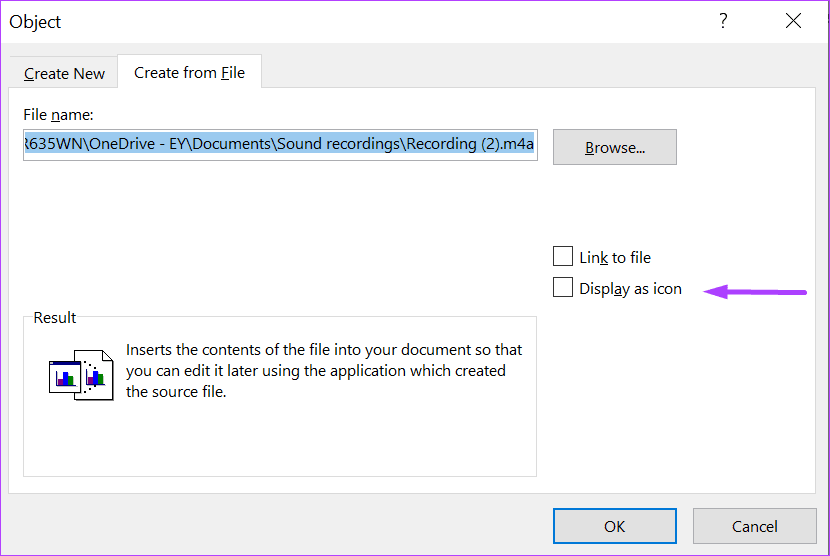
When you insert audio files on Microsoft Word using a Windows PC, such files don’t play on Word for Mac. Because of this, we suggest that you host your source audio on the cloud and link it in the Word document instead of embedding the file. Step 12: Tick the box beside Display as icon to show the audio file as an icon within your document instead of as a link.
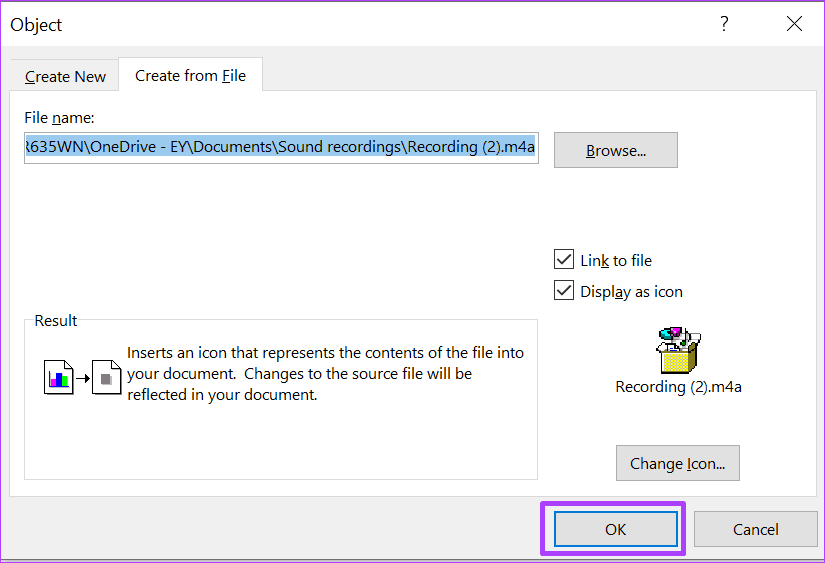
Choosing to link an audio in your Word file instead of embedding it also helps reduce the file size. Step 13: Click on OK once you are done.
Step 14: Click on Save on Microsoft Word to retain your changes. Adding the files is one thing and playing them is a different ball game. Check the next section to learn how to play audio files in Microsoft Word documents.
Playing Audio Files in Microsoft Word
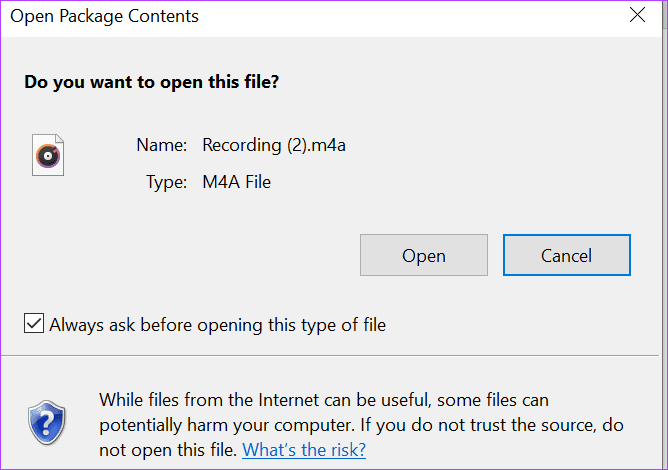
What do you do when someone shares a Microsoft Word document containing an audio file? How do you play such files in MS Word? It isn’t as difficult as you think it is, and the steps below will show you what to do: Step 1: Go to the location of the audio file in the Word document and double-click on the icon or file name.
Step 2: Click Open on the launched dialog box labeled Open Package Contents.
The audio file plays via your default media player once you click Open. On Windows, the default media player is either Windows Media Player or Groove Music. On Mac, the default media player is QuickTime Player. Step 3: Control the play of the audio file using the Control buttons in your media player. Doing this helps you play, pause, stop, fast-forward, rewind, and close the file based on your purposes.
Inserting Multiple Audio Files
You now know how to insert and play audio files in Microsoft Word. How many audio files can you insert into a single Word document? You can insert as many as you desire using the method above, and your file recipient can listen to the files one after the other. But note that, adding more files will only make the Word file fatter. However, the audio files make your documents unique and easy to understand. The above article may contain affiliate links which help support Guiding Tech. However, it does not affect our editorial integrity. The content remains unbiased and authentic.


